Last Updated: October 30, 2026
Quick Summary
To verify data destruction certificates, check the serial numbers and asset tags against your inventory, confirm the named method, destruction date and location, and validate signatures and certificate ID through a trusted channel. Request the underlying process evidence, such as per-drive erasure reports or photo documentation, because a certificate alone cannot prove data destruction occurred.
- A certificate listing only a quantity with no serial numbers cannot prove which devices were destroyed.
- Reconcile serials first, then quantities, and classify every discrepancy as an exception with a written explanation.
- Confirm the certificate ID through a channel you already trust, not the phone number printed on the document.
- Match the evidence to the method: erasure logs, degaussing field strength records, or physical destruction photos.
- A destruction date that precedes the pickup date is a red flag, not a typo to overlook.
Table of Contents
- Why a Certificate Alone Proves Nothing Until You Verify It
- Data Destruction Certificate Requirements: The Fields That Make It Auditable
- How to Verify a Data Destruction Certificate Step by Step
- Match Certificates to Your Asset Inventory Before You Accept Them
- Independent Verification: Confirming Authenticity and Post-Process Proof
- Data Destruction Chain of Custody: Following the Record End to End
- Build a Data Destruction Verification Checklist You Can Reuse
- Using a Data Destruction Certificate Template to Standardize Reviews
- Frequently Asked Questions
Why a Certificate Alone Proves Nothing Until You Verify It
A data destruction certificate is only as good as the checks you run against it.
That gap is where real risk lives. Many businesses file a certificate away and assume the audit trail is closed.
Watch out: accepting a certificate with no serial numbers attached is a common error.
If you already know you need auditable destruction, contact Erecycler for current pricing and a quote.
Data Destruction Certificate Requirements: The Fields That Make It Auditable
A data destruction certificate must identify the asset, the method, the date, the location, and the people involved. Miss any one of those and the document fails as audit evidence.
The NIST guidelines for media sanitization set the benchmark for what a credible record should show. Here are the fields that matter most.
Asset Identification: Serial Numbers, Asset Tags, and Unique Identifiers
Every destroyed device needs a unique identifier on the certificate. That means the manufacturer serial number, your internal asset tag, or both.
- Serial number from the drive or device label
- Your asset tag, matching your inventory system
- Device type and capacity where relevant
A certificate that lists “50 hard drives” with no identifiers is close to useless. Push back on it.
Method, Date, and Location: What Each Field Must Show
The method field must name the process, not describe it vaguely. “Destroyed” tells you nothing. “Shredded to NIST 800-88 standard” tells you what happened. For more on what that standard requires, read our guide to NIST 800-88 hard drive shredding requirements.
The date should be the actual destruction date, not the pickup date. The location should say whether destruction happened onsite or at a secure facility.
How to Verify a Data Destruction Certificate Step by Step
Verification is a five-step process: check the identifiers, confirm the method, validate the date and location, confirm signatures, and reconcile against your inventory.
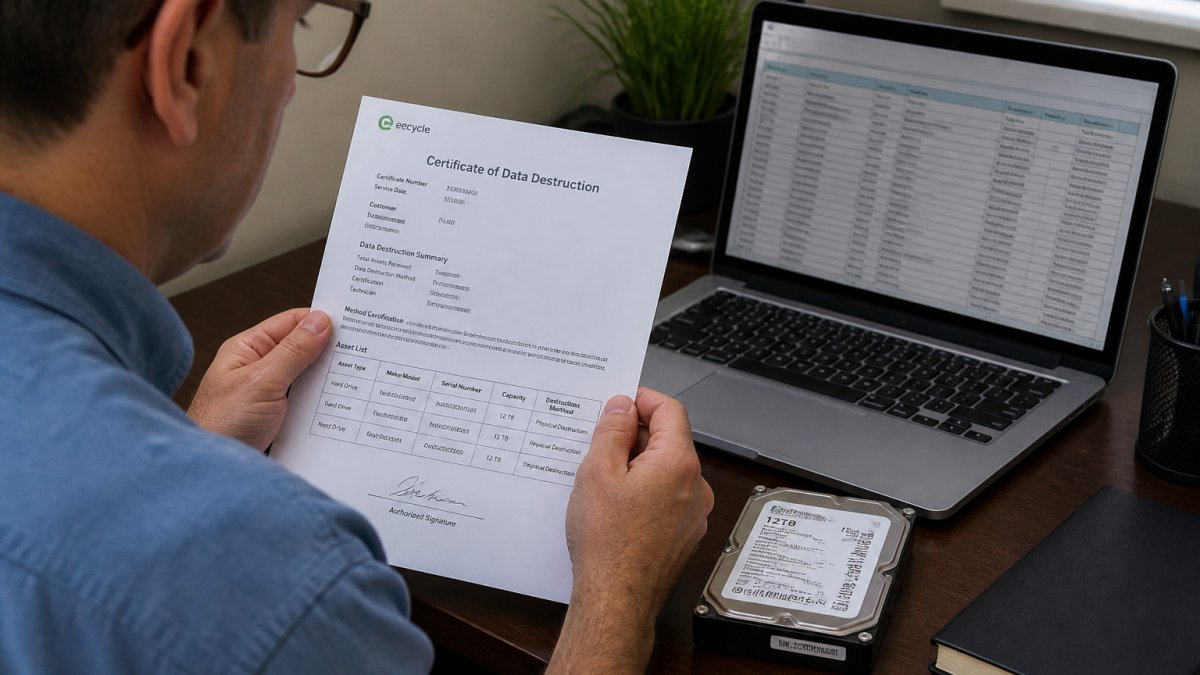
Work through these in order:
- Pull your decommissioned asset list for the period.
- Compare every serial number on the certificate to your list.
- Confirm the stated method matches what you contracted for.
- Check the destruction date falls inside the service window.
- Confirm the location is a facility you can name.
- Verify the operator and witness signatures are present.
- File the certificate with the matching pickup manifest.
If any step fails, stop and request clarification before you close the record. For the underlying hard drive shredding and secure data destruction that produces these certificates, you can review the service options.
Match Certificates to Your Asset Inventory Before You Accept Them
Reconciliation is where most organizations get caught out. A certificate can look perfect and still cover the wrong devices.
Start with your asset inventory as the source of truth, not the certificate.
Pass 1: Identifier match. Compare the manufacturer serial number and your internal asset tag on each certificate line against your inventory.
Pass 2: Quantity and batch reconciliation. Batch-level checks feel reassuring but hide errors.
Pass 3: Exception classification. Sort every discrepancy into one of four buckets and require a written explanation for each before sign-off:
- Missing from certificate: a device on your list with no certificate line. This is the highest-risk bucket because it may mean the device was never destroyed.
- Extra on certificate: a certificate line with no matching asset record. This can indicate a data-entry error or a device from another customer’s batch.
- Identifier mismatch: a serial or tag that does not match either system. Confirm whether it is a transcription error before accepting a corrected certificate.
Do not accept a corrected certificate that changes serial numbers without a written explanation and a reference to the original certificate ID. A silent correction breaks the audit trail and makes the record unverifiable later.
A practical pattern is to build the reconciliation in a spreadsheet with one row per device and columns for inventory serial, inventory tag, certificate ID, certificate serial, certificate line number, match status, and exception notes. This gives you a defensible record of the review itself, not just the certificate. Auditors increasingly ask for evidence that someone checked the certificate, and the reconciliation worksheet is that evidence.
If your inventory is incomplete, say so in the record.
Independent Verification: Confirming Authenticity and Post-Process Proof
Independent verification means answering two separate questions: did this certificate come from the provider, and did the destruction actually happen? Most guides stop at the first question and treat the document’s appearance as proof. It isn’t. A convincing PDF is easy to produce; a verifiable record is not.
Confirming Certificate Authenticity
Authenticity checks should not rely on the phone number printed on the certificate, because a fraudulent document can print a fraudulent number. Use a channel you already trust: your account manager’s known contact, the provider’s published verification portal, or a previously established email thread.
Work through these checks:
- Certificate ID lookup. Ask the provider to confirm the certificate ID against their internal records and to state the destruction date, method, and device count they have on file. If their answer differs from the document, stop.
- Signature and signer identity. Confirm the printed names correspond to real employees or authorized agents, and ask whether signatures are applied through a controlled system rather than added as an image. A wet-ink signature on a scanned page is weaker evidence than a system-generated signature with a verifiable signer identity.
- Timestamps. Check that the certificate date, the manifest date, and the transport record are in a plausible sequence. A destruction date that precedes the pickup date is a red flag, not a typo to overlook.
Keep the provider’s verification response, whether an email or a portal screenshot, with the certificate. The response is the evidence that you checked, and it is what an auditor will ask for.
Method-Specific Post-Process Proof
A certificate is a summary. The underlying process evidence is what establishes that destruction completed successfully, and the right evidence depends on the method and media type.
- Erasure (sanitization): ask for a per-drive sanitization report showing the software or tool used, the sanitization standard applied, and the result for each drive. A certificate that says “data erased” without a per-drive result does not establish completion.
- Degaussing: ask for a field strength record and confirmation that the drive was rendered unusable, plus the degausser model and the magnetic field strength applied. Degaussing does not work on all media types, so confirm the method was appropriate for the drives in question.
- Physical destruction: ask for photo documentation, the shred size or particle size specification, and confirmation of the destruction equipment used. A shredding certificate establishes that media was destroyed, not that every drive in the batch was destroyed.
What most guides miss is that these evidence types are not interchangeable. A shredding certificate does not substitute for an erasure log, and an erasure log does not prove physical destruction. Match the evidence to the method you contracted and the media type you sent.
What a Certificate Cannot Establish on Its Own
Be explicit about the limits. A certificate cannot prove that a specific drive contained the data you think it did, that the drive was not swapped before destruction, or that the destruction occurred at the stated time. Those questions are answered by chain of custody, serialized manifests, and process evidence, not by the certificate alone. Treating the certificate as the whole record is the most common verification failure.
When Verification Fails
If authenticity cannot be confirmed, or the process evidence is missing or inconsistent, escalate in writing. Request a replacement certificate with a written explanation, ask for the underlying process records, and hold the record open until the discrepancy is resolved. Do not close the file on a verbal assurance. If the provider cannot produce verifiable evidence, treat the destruction as unconfirmed and document that conclusion, because an unconfirmed record is a finding you can defend and a falsely closed record is not.
Data Destruction Chain of Custody: Following the Record End to End
Chain of custody is the documented trail from pickup to destruction. It should connect four records: the pickup manifest, the transport log, the destruction certificate, and the final disposition record.
Any break in that chain is a finding. If the manifest shows 40 devices but the certificate shows 38, you have two devices unaccounted for.
You can see how Erecycler documents its work on our data destruction documentation page.
Ask your provider how they handle exceptions.
Build a Data Destruction Verification Checklist You Can Reuse
A reusable checklist keeps your reviews consistent across vendors and audit cycles. Here’s the one we recommend.
| Check | What to Confirm | Pass Criteria |
|---|---|---|
| Identifiers | Serial numbers and asset tags listed | Every device traceable |
| Method | Named standard, not vague wording | Matches contract |
| Date | Destruction date, not pickup date | Inside service window |
| Location | Onsite or named facility | Verifiable address |
| Signatures | Operator and witness | Both present |
| Inventory match | Certificate vs asset list | Zero unexplained gaps |
| Chain of custody | Manifest, transport, certificate linked | No breaks |
| Certificate ID | Retrievable from provider | Confirmed authentic |
Run every certificate through this list before filing. For quick answers on documentation and process questions, see our frequently asked questions page.
Using a Data Destruction Certificate Template to Standardize Reviews
A certificate template does two things: it tells your vendor what you expect, and it gives your team a fixed standard to check against. Send yours to providers before the first pickup.
Your template should require:
- A unique certificate ID on every page
- Full serial numbers, not partials
- The named destruction standard
Standardizing the format cuts review time and makes discrepancies obvious. It also signals to vendors that you check, which tends to improve what they send you.
Frequently Asked Questions
How do you check if a data destruction certificate is real or fake?
Start with the certificate ID and contact the provider through a phone number or email you already have on file, not one printed on the document. Ask them to confirm the certificate ID, the serial numbers listed, the destruction method, and the date. Cross-check the serial numbers against your own asset inventory and the pickup manifest. A genuine certificate should also carry an authorized signature and, where applicable, a witness signature. If the provider cannot confirm the details directly, treat the certificate as unverified until they do.
What information should a data destruction certificate include?
A usable certificate lists the unique identifier for each data-bearing device, such as a serial number or asset tag, plus the destruction method (shredding, degaussing, or erasure), the destruction date and location, and the name of the operator and any witness. It should also show a certificate ID, the provider’s contact details, and reference to the standard followed, such as NIST 800-88. Missing any of these fields weakens the record for audit purposes, so ask for a corrected certificate rather than accepting an incomplete one.
How can I confirm a certificate matches the devices that were destroyed?
Reconcile the certificate line by line against three documents: your asset inventory, the pickup manifest signed at collection, and the certificate itself. Every serial number or asset tag on the manifest should appear on the certificate with a matching destruction method. Flag any device on your inventory that has no certificate entry, and any certificate entry that is not on your inventory. This reconciliation is the step most organizations skip, and it is the one that catches swapped or missing devices.
How long should I keep a data destruction certificate?
Retention depends on your regulatory obligations and internal policy, so confirm the specific period with your compliance officer. As a practical baseline, keep certificates, chain-of-custody records, and pickup manifests together for as long as the related asset records are retained, since auditors typically ask for the full set rather than the certificate alone. Store them in a system that is separate from the devices themselves, with the certificate ID indexed so a single search returns the certificate, the custody record, and the inventory line.
Verifying certificates takes discipline, and most providers make it harder than it should be. Erecycler builds the record into the service: documented chain of custody for every asset, hard drive shredding to NIST 800-88 standards, and certificates designed to be checked, not just filed. We’ve served more than 112,000 clients, from single-laptop users to multinational data centers. Get started with Erecycler and turn your destruction records into audit-ready evidence.
