Last Updated: November 8, 2026
Quick Summary
To track decommissioned server hardware, build a serial-level asset inventory before anything moves, then tag, photograph and seal each unit and record every signed handoff in a chain of custody. Sanitize and verify each drive, log the result against its serial, and close the record with disposition and retention proof.
- Reconcile the CMDB export against the physical rack and resolve every unrecorded unit before it is pulled.
- Photograph the front, rear and tag of each server and record the tamper-evident seal number in the inventory row.
- NIST SP 800-88 defines clear, purge and destroy as the three sanitization categories.
- Choose disposition software for continuous multi-site retirement and a locked spreadsheet for a one-time teardown.
- Close each row with a disposition date, outcome and downstream certificate, then retain the record as required.
Table of Contents
- Why Decommissioned Server Hardware Slips Through the Cracks
- Step 1: Build the Asset Inventory Before Anything Moves
- Step 2: Tag, Photograph and Seal Each Unit
- Step 3: Establish Server Chain of Custody at the Rack
- Step 4: Sanitize Data and Verify It Before Disposition
- Step 5: Run the Retirement Against an IT Asset Disposition Checklist
- Step 6: Choose IT Asset Disposition Software or a Manual Register
- Step 7: Close the Record With Disposition and Retention Proof
- Frequently Asked Questions
Why Decommissioned Server Hardware Slips Through the Cracks
How to track decommissioned server hardware starts with one uncomfortable fact: most organizations lose control of retired servers the moment they leave the rack. The unit gets pulled, stacked in a hallway, and quietly forgotten.
Servers are easy to lose track of because they stop mattering to the people who own them. The application team has already migrated. Facilities just wants the floor space back.
The fix is a documented retirement process. A full data center decommissioning project is the umbrella this tracking workflow feeds into, and the steps below are how you keep every server accounted for along the way.
Step 1: Build the Asset Inventory Before Anything Moves
The inventory must exist before the first cable is unplugged. Build it from your existing configuration management database and contracts, then reconcile it against what is physically in the rack. Discrepancies found now are cheap to fix. Discrepancies found after pickup are audit findings.
Reconciliation is often where the real work sits. A CMDB reflects what was provisioned, not what is actually bolted into the rack after years of drive swaps, NIC replacements, and undocumented moves.
Fields Every Retired Server Record Needs
At minimum, each retired server record should capture:
- Asset tag and any internal tracking number
- Serial number and model number
- Rack location and hostname
- Configuration: CPU, memory, drive count, network cards
- Equipment age and end of support date
- Data-bearing components and their serials
- Equipment status at each stage of retirement
The IT Asset Inventory Template That Holds Up in an Audit
A workable IT asset inventory template is a single spreadsheet or database table with one row per server and one column per field above. Add three columns most templates miss: sanitization method, verification result, and disposition date.
The schema matters more than the tool. A record that survives review typically carries these columns, in this order, so a reviewer can read left to right from identity to closure:
- Asset tag (unique, barcoded, matches the physical label)
- Serial number (manufacturer serial, not an internal alias)
- Manufacturer and model
- Rack and RU position at removal
- Hostname and the application or owner it served
- Configuration summary (CPU, memory, drive count, NIC count)
- Data-bearing component serials (one row per drive, mapped to the parent server)
- Retirement status (staged, sanitized, in custody, disposed)
- Custody holder and date of last handoff
- Sanitization method and date
- Verification result and who verified it
- Disposition outcome (reuse, resale, recycle, destroy) and date
- Certificate or report reference from the downstream handler
Two structural choices make the difference between a list and a control. First, keep drives in a child table keyed to the server serial, not as a comma-separated cell, so each drive serial can carry its own sanitization and verification record. Second, make status a controlled list rather than free text; a status field that accepts anything cannot be filtered, counted, or reconciled.
Watch out: a spreadsheet that lives on one person’s laptop is not an inventory of record.
For a companion walkthrough on proving each item was completed, see how to audit IT asset disposal and prove compliance.
Step 2: Tag, Photograph and Seal Each Unit
Every unit gets a physical tag before it moves. Use a durable barcoded asset tag that matches the inventory row exactly. Photograph the front, the rear, and the tag on each server. The photo proves the unit existed in that condition at that moment.
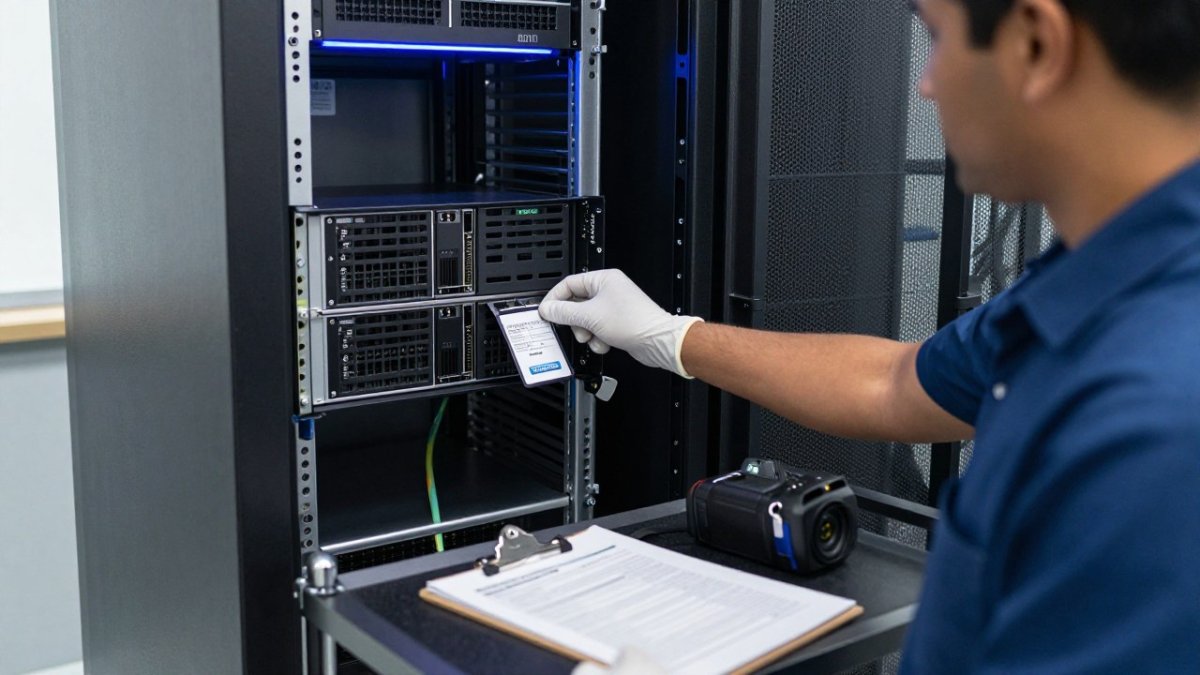
Seal the unit next. A tamper-evident seal across the chassis lid or drive bays gives you a simple check later: a broken seal means the unit was opened after it left your control. Record the seal number in the inventory row.
Step 3: Establish Server Chain of Custody at the Rack
Server chain of custody is the documented, signed record of who held each asset at every point from removal to final disposition. A signed chain of custody makes each transfer traceable, and DIAGRAM8 connects that discipline to the broader work of achieving audit-grade compliance.
Start the custody record at the rack. The technician who pulls the server signs it over to the staging area. From there, every handoff gets a name, a date, a time, and a signature.
This is where documentation quality separates providers. The record is the product in this industry, and you can see how documented chain-of-custody records are built so you can replicate the same proof trail internally.
Step 4: Sanitize Data and Verify It Before Disposition
No retired server leaves your control until its drives are sanitized and the result is verified. Sanitization is the process of rendering data unrecoverable; verification is the evidence that it worked. Skip the second part and you have a claim, not a control.
The widely used benchmark here is NIST SP 800-88, which defines clear, purge, and destroy as the three sanitization categories. For drives leaving the building, physical destruction is the safest path. Our own practice is hard drive shredding to NIST 800-88 standards, and you can review the NIST 800-88 hard drive shredding requirements to confirm your method will pass verification.
Log the method, the date, the operator, and the verification result against each drive serial in your inventory.
Step 5: Run the Retirement Against an IT Asset Disposition Checklist
An IT asset disposition checklist turns the process into something you can audit rather than remember. Work the list per unit or per batch, and record completion against each line.
| Checklist Item | What It Proves | Record Produced |
|---|---|---|
| Inventory row created | Asset identity captured | Serial-level inventory entry |
| Tag, photos, seal applied | Condition and integrity at removal | Photo set and seal number |
| Custody signatures collected | Who held the asset, when | Signed transfer log |
| Drives sanitized and verified | Data is unrecoverable | Sanitization certificate |
| Disposition completed | Hardware left responsibly | Disposition and recycling record |
For a companion walkthrough on proving each item was completed, see how to audit IT asset disposal and prove compliance.
Step 6: Choose IT Asset Disposition Software or a Manual Register
IT asset disposition software automates the record-keeping: barcode scanning, custody logs, certificate storage, and reporting. It earns its place when you retire hardware continuously or across multiple sites. A manual register works fine for a one-time teardown of a few dozen units, as long as one person owns it and the template is locked down.
Pick based on volume, not ambition. Continuous retirement across locations: software. Occasional batch retirement: a controlled spreadsheet with named ownership. Either way, the fields and the custody discipline stay identical.
The decision is really about three things: how often hardware retires, how many people touch the record, and whether an auditor will ask you to reproduce a chain of events months later. A single-site teardown of a few dozen servers, handled by one team, is well served by a locked spreadsheet. Continuous retirement across multiple sites, with handoffs between internal staff and a downstream vendor, is where manual registers break down, because the record has to move with the asset and survive several owners.
What to Evaluate in IT Asset Disposition Software
When you do evaluate software, score it against the workflow in this guide rather than against a feature brochure:
- Barcode and serial capture: can a technician scan an asset tag and a drive serial at the rack, offline if the floor has no network, and sync later?
- Custody log: does every handoff require a named user, a timestamp, and a signature or e-signature, and is the log append-only?
- Sanitization records: can each drive serial carry a method, a verification result, and a certificate attachment, separate from the parent server?
- Disposition and certificates: does the system store downstream certificates and link them back to serials, so a diversion or zero-landfill report can be traced to units?
- Reporting and export: can you export the full record set in a form a compliance team or auditor can read without the vendor’s portal?
- Integration: does it accept a CMDB export for reconciliation, and can it push disposition status back so the CMDB does not keep retired units listed as active?
That last point is the one most buyers miss. If disposition status never flows back to the configuration management database, the CMDB slowly fills with servers that no longer exist, and the next reconciliation starts from a worse baseline.
When a Manual Register Is the Right Call
A manual register is defensible when the scope is bounded. Use a spreadsheet or a lightweight database table with the schema from Step 1, one tab for servers and one for drives, a controlled status list, and a named owner per site.
Watch out: a manual register fails quietly when ownership changes.
Either way, the fields and the custody discipline stay identical, and the record must close with the same disposition proof described in Step 7.
Step 7: Close the Record With Disposition and Retention Proof
A retirement is not finished until the record proves where the hardware went. Close each row with a disposition date, a recycling or reuse outcome, and a certificate or report from the downstream handler.
This closing step is also where sustainability reporting comes from. When you’re ready to hand off the hardware, server recycling with the drives destroyed first returns exactly that disposition documentation.
The hard part of tracking retired servers is not the technology. It is assigning ownership and holding the discipline from the rack to the final certificate.
Frequently Asked Questions
What information should a retired server asset record include?
At minimum, capture the asset tag, manufacturer, model number, serial number, and the hardware configuration including CPU, memory, and drive count. Add the rack location, the date the server entered service, the end-of-support date, and the decommission date. Record who authorized retirement, who physically removed the unit, and where it went. Attach the sanitization certificate and the final disposition document. This set lets you answer an auditor’s questions about a decommissioned server months or years later without hunting through email.
How do you maintain chain of custody for retired server equipment?
Every handoff gets signed and dated. When a technician pulls the server from the rack, they sign it over to the transport lead. The transport lead signs it over to the recycler or resale partner at pickup, and that partner signs at receipt. Each transfer records the asset tag, the person’s name, the time, and the location. Photograph sealed pallets and record seal numbers. A server chain of custody that skips even one handoff is the gap an auditor will find first, so build the signature step into the removal process itself.
How can you verify that a decommissioned server’s data was destroyed?
Ask for a certificate of destruction tied to specific serial numbers, not a blanket letter. For drives erased in place, request the sanitization report showing the method used and the verification pass. NIST 800-88 recognizes clear, purge, and destroy as the three levels, and physical shredding counts as destroy. If drives leave your building, confirm the vendor shreds to that standard and provides certificates tied to serial numbers. Match every serial number on the certificate against your inventory before you close the record.
How long should decommissioned server records be retained?
Retention depends on what the hardware touched. Retention expectations vary by industry and by the data a server held, so confirm the requirement that applies to your organization. A practical baseline is to keep disposition records, certificates of destruction, and chain of custody documents for the full retention period that applies to the data the server held, then add a buffer. Check with your compliance officer, set the period in writing, and make it a field in your IT asset inventory template so records are never purged by accident.
